How to Set Up a Shopify Site & Store: Complete Step-by-Step Guide 2026
Complete guide on how to set up a Shopify site, website, and store: account setup, store configuration, design, products, payment setup, and essential apps. Step-by-step instructions for beginners.
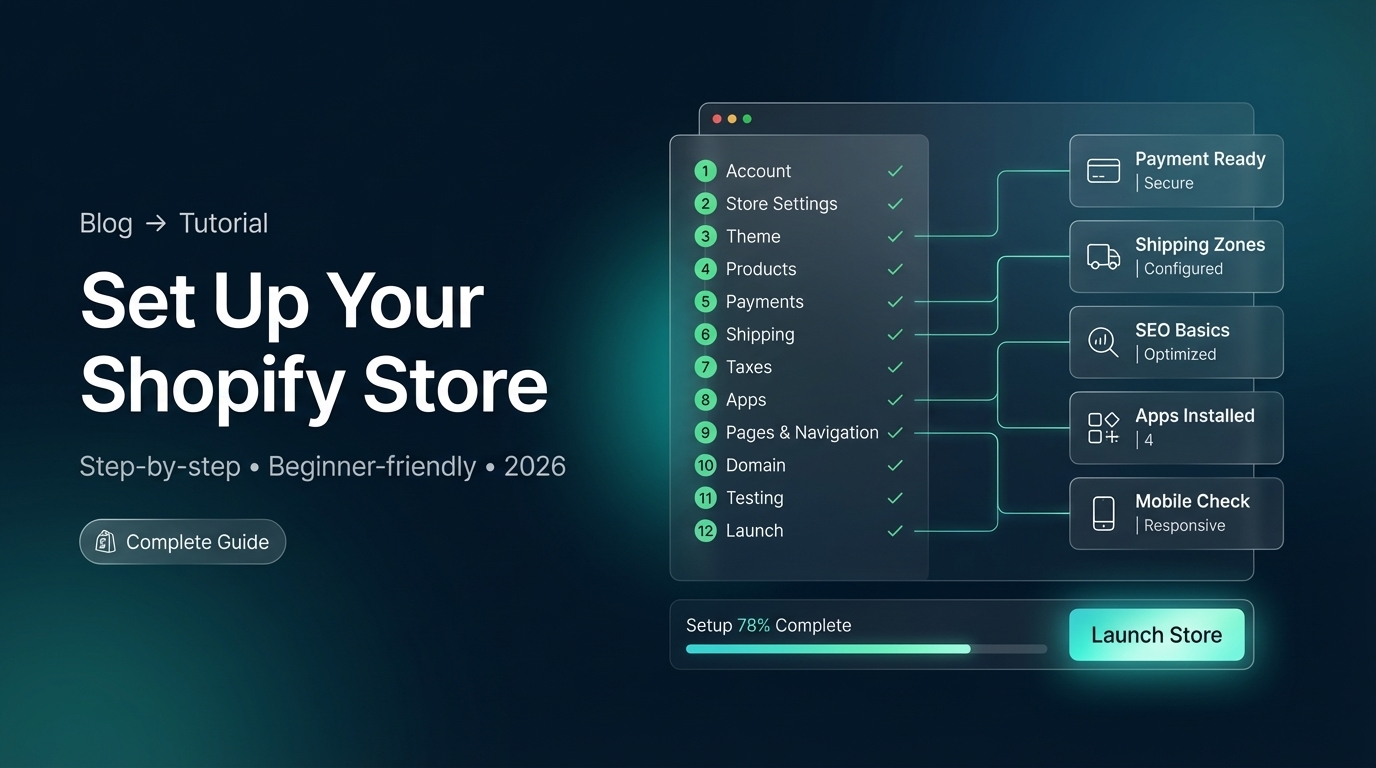
How to Set Up a Shopify Site (Quick Answer)
Setting up a Shopify site is straightforward: Create a Shopify account (14-day free trial), choose a theme, add products, configure payments and shipping, customize your design, install essential apps, and launch. The entire process takes 1-3 days for a complete store, with Shopify’s user-friendly interface guiding you every step.
This guide walks you through the complete setup process from account creation to launching your first sale.
Looking for professional Shopify development services? We can help you set up and customize your Shopify store. Check out our Shopify development services for custom solutions.
Fuentes y Recursos Externos
- Shopify Developer Documentation - Documentación oficial de Shopify para desarrolladores
- Shopify Partners - Programa oficial de partners de Shopify
Step 1: Create Your Shopify Account
How to Set Up Shopify Account
-
Visit Shopify.com
Go to [shopify.com](https://www.shopify.com) and click 'Start free trial'. The free trial is 14 days with no credit card required. You can fully set up your store during this period.
-
Enter Your Email
Enter your email address and create a password. Use a business email if you have one. You'll receive a verification email to confirm your account.
-
Answer Setup Questions
Shopify asks: Are you already selling? What will you sell? What's your business type? Answer honestly - this helps Shopify customize your experience.
-
Choose Your Store Name
Enter your store name. This creates your store URL (yourname.myshopify.com). You can change this later, and you can add a custom domain anytime.
-
Verify Your Email
Check your email and click the verification link. This activates your Shopify account and starts your 14-day free trial.
What You Need Before Starting
Prerequisites
- Email address (business email preferred)
- Store name idea (can be changed later)
- Basic business information
- Understanding of what products you'll sell
- About 1-3 hours for initial setup
Step 2: Complete Store Setup
Initial Store Configuration
After creating your account, complete the store setup:
Store Setup Tasks
- Complete business profile (address, contact info)
- Set store currency and timezone
- Configure store address for shipping calculations
- Add store description and brand information
- Upload store logo (optional but recommended)
- Set up contact information
Step 3: Choose and Customize Your Theme
How to Design Your Shopify Website
Step 1: Browse Themes
-
Visit Theme Store
Go to Online Store > Themes in your Shopify admin. Click 'Browse themes' to see free and paid options. Free themes are excellent for starting. Paid themes ($140-$350) offer more features.
-
Choose a Theme
Popular free themes: Dawn (modern, fast), Debut (versatile), Craft (minimalist). Preview themes to see how they look. Consider your product type and brand style when choosing.
-
Install Theme
Click 'Add' on your chosen theme. It installs immediately. You can install multiple themes and switch between them, but only one is live at a time.
-
Customize with Theme Editor
Click 'Customize' to open the theme editor. Here you can: Change colors and fonts, Add your logo, Customize homepage sections, Configure product page layout, Set up navigation menus.
-
Preview Changes
Use the preview pane to see changes in real-time. Preview on desktop and mobile. Save changes when satisfied. Changes are saved as drafts until you publish.
Design Customization Tips
Design Best Practices
- Choose colors that match your brand identity
- Use high-quality product images (minimum 2048x2048px)
- Keep homepage clean and focused on products
- Ensure mobile responsiveness (themes are mobile-ready)
- Add trust badges (secure checkout, return policy)
- Create clear navigation menus
- Add compelling product descriptions
- Test on multiple devices before launching
Step 4: Add Your Products
Setting Up Your Product Catalog
-
Navigate to Products
Go to Products > All products in your Shopify admin. Click 'Add product' to create your first product listing.
-
Enter Product Details
Add: Product title, Description (detailed and SEO-optimized), Product images (multiple angles, high quality), Price, Compare at price (for showing discounts), SKU (stock keeping unit), Barcode if applicable.
-
Create Variants
If product has options (size, color, material), create variants. Set different prices, images, and inventory for each variant. For example: Small/Red, Medium/Blue, etc.
-
Set Inventory Tracking
Enable inventory tracking if you want Shopify to track stock. Set starting quantity. Shopify will deduct inventory when orders are placed.
-
Organize with Collections
Create collections (categories) to organize products. Collections make navigation easier. For example: 'Summer Collection', 'Sale Items', 'Best Sellers'.
-
Import Products (Optional)
If you have many products, use CSV import. Go to Products > Import. Download the template, fill it out, and upload. This saves time for large catalogs.
Product Best Practices
Product Setup Tips
- Use descriptive, SEO-friendly product titles
- Write detailed product descriptions (200-500 words)
- Upload 5-8 high-quality product images
- Include lifestyle images showing product in use
- Set up variants for all size/color/option combinations
- Add product tags for better organization and search
- Set up automatic inventory tracking
- Organize products into logical collections
Step 5: Configure Payment Settings
Setting Up Payment Processing
-
Go to Payment Settings
Navigate to Settings > Payments in your Shopify admin. Here you configure how customers pay for orders.
-
Set Up Shopify Payments
Shopify Payments is the easiest option (if available in your country). Click 'Complete account setup' and provide: Business information, Bank account details, Tax information. Processing fees are lower with Shopify Payments.
-
Or Add Third-Party Gateway
If Shopify Payments isn't available, add PayPal, Stripe, or other supported gateways. Click 'Add payment method' and follow setup instructions. Each gateway has its own fees.
-
Configure Manual Payment Methods
Optional: Add cash on delivery, bank transfers, or other manual methods. Useful for local businesses or specific customer preferences.
-
Test Payment Processing
Use Shopify's test mode to verify payments work correctly. Create a test order and process payment to ensure everything functions properly.
Payment Method Comparison
| Method | Fees | Setup Difficulty | Best For |
|---|---|---|---|
| Shopify Payments | 2.9% + 30¢ (online) | Easy | Most stores |
| PayPal | 2.9% + 30¢ | Easy | Customer trust |
| Stripe | 2.9% + 30¢ | Medium | Advanced features |
| Manual Payments | Free | Easy | COD, bank transfer |
Step 6: Set Up Shipping
Configuring Shipping Zones and Rates
-
Go to Shipping Settings
Navigate to Settings > Shipping and delivery. Configure shipping zones (regions where you ship) and rates (costs for shipping).
-
Create Shipping Zones
Add shipping zones (e.g., 'United States', 'International', 'Local'). Each zone can have different rates. Start with your primary market.
-
Set Shipping Rates
Choose rate type: Free shipping, Flat rate ($5, $10, etc.), Weight-based, Price-based, or Carrier calculated (real-time rates from USPS, FedEx, etc.).
-
Configure Package Details
Set default package dimensions and weight. This is used for carrier-calculated shipping rates. Accurate dimensions help customers see correct shipping costs.
-
Set Up Local Delivery
If offering local delivery, add local delivery options with rates. Great for local businesses serving nearby customers.
Step 7: Configure Taxes
Setting Up Tax Settings
Tax Configuration
- Go to Settings > Taxes
- Enable automatic tax calculation (Shopify handles it)
- Set your business location
- Configure tax rates for different regions if needed
- Set up tax exemptions if applicable
- Consult with a tax professional for complex tax situations
Step 8: Install Essential Apps
Must-Have Apps for Your Shopify Store
Enhance your store functionality with essential apps. Here are some highly recommended apps to improve customer experience and boost sales:
1. Virtual Try-On for Fashion (Recommended)
Spark - Try ON allows customers to see how clothing looks on them using AI-powered virtual try-on technology. This app:
- Reduces returns caused by size and fit uncertainty
- Increases conversion rates by helping customers visualize products
- Works with your existing product images (no 3D models needed)
- Features a customizable “Try On” button
- Offers free plan with 20 trials, Pro plans starting at $10/month
Perfect for fashion, apparel, and accessories stores. Virtual try-on technology helps customers make confident purchase decisions.
2. WhatsApp Chat Button (Recommended)
Spark - WhatsApp Chat Button adds a WhatsApp chat button to your store, enabling instant customer communication. Features include:
- Customizable button (color, size, position)
- Automated messages and quick replies
- Click-to-chat functionality
- Mobile-optimized for better customer support
- Free plan available with basic features
- Works with all modern Shopify themes
This app improves customer service and can significantly boost sales by enabling instant communication with customers who have questions.
3. Additional Recommended Apps
| App Category | Purpose | Why It Matters |
|---|---|---|
| Email Marketing | Klaviyo, Omnisend | Automate abandoned cart recovery, send newsletters |
| Reviews & Trust | Judge.me, Stamped.io | Collect and display customer reviews |
| SEO | Plug in SEO, Smart SEO | Optimize store for search engines |
| Analytics | Google Analytics, Hotjar | Track store performance and user behavior |
| Inventory Management | Stocky, TradeGecko | Advanced inventory tracking |
| Social Proof | Fomo, Loox | Show recent purchases and activity |
How to Install Apps
-
Visit Shopify App Store
Go to Apps > App and sales channel settings, then click 'Shopify App Store'. Browse apps by category or search for specific functionality.
-
Choose an App
Read app descriptions, reviews, and pricing. Many apps offer free plans or trials. Click 'Add app' on apps you want to install.
-
Install and Configure
Follow the installation prompts. Most apps require some configuration in your Shopify admin. Set up according to app instructions.
-
Test Functionality
Test the app on your store to ensure it works correctly. Make sure it doesn't conflict with your theme or other apps.
Step 9: Set Up Pages and Navigation
Creating Essential Pages
Must-Have Pages
- About Us - Tell your brand story
- Contact Us - Customer support information
- Privacy Policy - Legal requirement
- Terms of Service - Legal requirement
- Shipping Policy - Delivery information
- Return/Refund Policy - Return process
- FAQ - Common customer questions
Setting Up Navigation
-
Create Navigation Menus
Go to Online Store > Navigation. Create main menu (header) and footer menu. Add links to collections, pages, and external URLs.
-
Organize Menu Structure
Group related items. Use dropdown menus for categories. Keep navigation simple and intuitive. Test on mobile devices.
-
Add to Theme
Most themes automatically use your navigation menus. Customize in theme editor if needed.
Step 10: Set Up Your Domain
Using Your Custom Domain
-
Purchase Domain (if needed)
Buy a domain from Shopify ($11-15/year) or use a domain registrar like GoDaddy, Namecheap, or Google Domains.
-
Connect Domain to Shopify
Go to Settings > Domains. Click 'Connect existing domain' and follow instructions to connect your domain. Shopify provides step-by-step DNS instructions.
-
Set as Primary Domain
Once connected, set your custom domain as primary. This replaces the .myshopify.com URL in customer-facing areas.
-
Set Up SSL
Shopify automatically provides SSL certificates for security. Your store will use HTTPS (secure connection).
Step 11: Test Your Store
Pre-Launch Checklist
Before Going Live
- Test checkout process end-to-end
- Verify payment processing works
- Test on mobile devices (critical!)
- Check all links and navigation
- Review product pages for accuracy
- Test contact forms and email
- Verify shipping calculations
- Check all pages load correctly
- Test installed apps functionality
- Review legal pages (Privacy, Terms)
Step 12: Launch Your Store
Going Live
-
Remove Password Protection
During setup, your store is password-protected. Go to Online Store > Preferences and disable password protection to make your store public.
-
Choose Your Shopify Plan
Select a plan: Basic Shopify ($29/month), Shopify ($79/month), or Advanced Shopify ($299/month). Choose based on your needs. You can upgrade anytime.
-
Set Up Billing
Enter payment information for your Shopify subscription. You'll be billed monthly. The 14-day free trial continues until you're ready to launch.
-
Announce Your Launch
Share your store on social media, email your network, run ads, and start marketing. Your store is now live and ready for customers!
Timeline: How Long Does Setup Take?
Summary: Shopify Store Setup Timeline
| Task | Time Required | Priority |
|---|---|---|
| Account Creation | 10 minutes | Essential |
| Basic Configuration | 30 minutes | Essential |
| Theme Selection & Customization | 2-4 hours | Essential |
| Product Upload (10 products) | 1-2 hours | Essential |
| Payment & Shipping Setup | 30-60 minutes | Essential |
| Apps Installation | 30 minutes | Recommended |
| Pages & Navigation | 1 hour | Essential |
| Testing & Review | 1-2 hours | Essential |
| Total (Basic Store) | 6-12 hours | |
| Total (Complete Store) | 1-3 days |
Pro tip: You can set up a basic store in 6-12 hours. Allow 1-3 days for a complete, polished store with all features and apps. Use the 14-day free trial to take your time and get everything right.
Cost Breakdown
Shopify Store Setup Costs
| Item | Cost | Required? |
|---|---|---|
| Shopify Plan | $29-$299/month | Yes (after trial) |
| Theme | Free-$350 (one-time) | Optional (free themes available) |
| Domain Name | $11-$15/year | Recommended |
| Apps | $0-$100+/month | Optional (free options available) |
| Product Photography | $0-$500+ | Recommended |
| Initial Setup Total | $0 (trial) + plan | Trial is free |
Common Setup Mistakes to Avoid
Avoid These Mistakes
- Skipping mobile testing (most traffic is mobile)
- Poor quality product images (hurts conversions)
- Not setting up proper shipping rates (confuses customers)
- Missing legal pages (Privacy Policy, Terms required)
- Overcomplicating navigation (keep it simple)
- Not installing essential apps (miss conversion opportunities)
- Rushing through setup (take time to do it right)
- Not testing checkout before launch
FAQ
Frequently asked questions
How do I set up a Shopify site?
To set up a Shopify site: 1) Create a Shopify account at shopify.com (14-day free trial), 2) Choose a store name and set your store details, 3) Complete store setup questionnaire (products, revenue goals), 4) Select a theme from the Shopify Theme Store, 5) Add your products (manual upload or CSV import), 6) Configure payment settings (Shopify Payments or third-party gateways), 7) Set up shipping zones and rates, 8) Configure taxes, 9) Customize your store design, 10) Add essential apps, and 11) Launch your store. The process typically takes 1-3 days for a basic store.
How do I set up a Shopify account?
To set up a Shopify account: Go to shopify.com and click 'Start free trial', Enter your email address and create a password, Choose whether you're selling already or just starting, Enter your store name (can be changed later), Provide basic information (business type, products you'll sell), Verify your email address, Complete the setup questionnaire about your business goals, and Start your 14-day free trial. No credit card required for trial. You can set up your store during the trial period and only pay when you're ready to launch.
How long does it take to set up a Shopify store?
Setting up a Shopify store takes: Basic store (template, few products): 2-4 hours, Complete store (customization, products, apps): 1-3 days, Professional store (custom design, many products): 1-2 weeks. The quick setup includes: Account creation (10 minutes), Basic configuration (30 minutes), Theme selection (15 minutes), Product upload (1-2 hours), Payment/shipping setup (30 minutes), Essential apps (30 minutes). More complex setups with custom design, many products, or integrations take longer. Shopify provides excellent documentation and support to speed up the process.
What do I need to set up a Shopify store?
To set up a Shopify store you need: A Shopify account (14-day free trial available), Email address, Business information (name, address, tax ID if applicable), Product information (images, descriptions, prices, variants), Payment method (credit card for Shopify plan, bank account for Shopify Payments), Domain name (included free .myshopify.com or custom domain), and Basic business knowledge. You don't need technical skills - Shopify's interface is user-friendly. Optional but recommended: Professional product photos, business logo, custom domain name, and essential apps to enhance functionality.
How do I design my Shopify website?
To design your Shopify website: 1) Choose a theme from the Shopify Theme Store (free or paid), 2) Customize the theme using the theme editor (colors, fonts, layouts), 3) Add your logo and branding elements, 4) Customize homepage sections (hero, featured products, testimonials), 5) Configure product page layout, 6) Set up navigation menus, 7) Add content pages (About, Contact, Privacy Policy), 8) Optimize for mobile (themes are responsive), 9) Test on different devices, and 10) Consider custom design if you need unique branding. Most themes offer extensive customization without coding. For advanced customization, consider hiring a Shopify developer or using Shopify's theme development tools.
Is it free to set up a Shopify store?
Shopify offers a 14-day free trial with no credit card required. During the trial, you can fully set up and customize your store. After the trial, Shopify plans start at $29/month for Basic Shopify, $79/month for Shopify, and $299/month for Advanced Shopify. Shopify Plus (enterprise) starts at $2,300/month. The free trial lets you: Create your store, Add products, Customize design, Set up payments and shipping, Test the checkout process, and Install apps. You only start paying when you're ready to launch and accept real orders.
Conclusion
Setting up a Shopify site is a straightforward process that anyone can complete in 1-3 days. The platform’s user-friendly interface guides you through each step, from creating your account to launching your store.
Key takeaways:
- Create account - 14-day free trial, no credit card required
- Choose theme - Free themes available, easy customization
- Add products - Upload manually or use CSV import
- Configure payments - Shopify Payments or third-party gateways
- Set up shipping - Configure zones and rates
- Install apps - Enhance functionality with apps like Spark - Try ON and Spark - WhatsApp Chat Button
- Test thoroughly - Ensure everything works before launch
- Launch and market - Your store is ready for customers
Our recommendation: Take advantage of the 14-day free trial to set up your store properly. Don’t rush - test everything, customize your design, and install essential apps. Use this guide as your checklist. Once your store is polished and tested, launch with confidence and start marketing to your target audience.
Ready to set up your Shopify store? Follow this guide step-by-step, and you’ll have a professional e-commerce site ready for customers in no time.