How to Allow Custom App Development in Shopify: Complete Guide 2026
Learn how to enable custom app development in Shopify: Partner account setup, development store configuration, API access, permissions, and testing. Step-by-step guide.
How to Allow Custom App Development in Shopify: Quick Answer
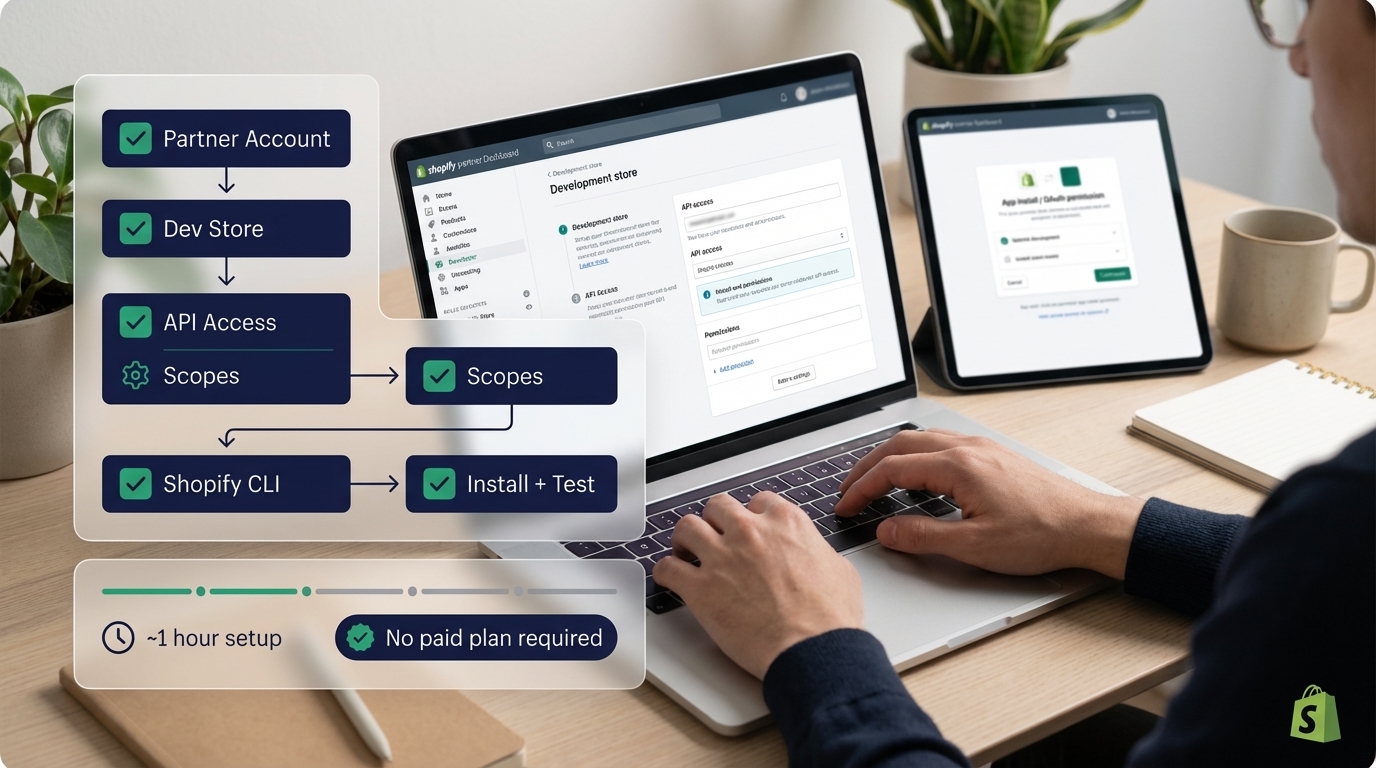
Short answer: To allow custom app development in Shopify, create a free Shopify Partner account at partners.shopify.com, then create a development store (unlimited free stores available). Configure API access, set app permissions, and use Shopify CLI for local development. No paid Shopify plan is required - development stores are free and full-featured for testing.
This guide walks you through the complete setup process step-by-step.
Looking for professional Shopify development services? We’ve built 65+ Shopify apps. Check out our Shopify development services for custom app development expertise.
Fuentes y Recursos Externos
- Shopify Developer Documentation - Documentación oficial de Shopify para desarrolladores
- Shopify Partners - Programa oficial de partners de Shopify
Why Develop Custom Apps?
Custom apps allow you to:
Benefits of Custom Apps
- Create store-specific solutions tailored to merchant needs
- Deploy faster without App Store approval process
- Build proprietary features not available in public apps
- Integrate with merchant's specific systems and workflows
- Maintain full control over code and updates
- Keep solutions private (not listed in App Store)
Step 1: Create Shopify Partner Account
The first step to allow custom app development is creating a Shopify Partner account.
-
Go to Shopify Partners
Visit partners.shopify.com and click 'Join now' or 'Get started'. The account is completely free - no credit card required.
-
Fill Out Registration Form
Enter your email, company name, and create a password. You'll need to verify your email address.
-
Complete Partner Profile
Add information about your business, services offered, and experience. This helps but isn't required for development stores.
-
Access Partner Dashboard
Once registered, you'll have access to the Partner Dashboard where you can manage apps, stores, and development tools.
Key Benefits of Partner Account:
- Free development stores (unlimited)
- Access to Shopify CLI and development tools
- API credentials and documentation
- App management and analytics
- Free access to Shopify Partner Academy
Step 2: Create Development Store
Development stores are free, full-featured Shopify stores specifically for app development and testing.
-
Navigate to Stores Section
In Partner Dashboard, click 'Stores' in the left sidebar, then click 'Add store' button.
-
Choose Development Store
Select 'Development store' option. This creates a test store that doesn't require payment.
-
Enter Store Details
Fill in store name (e.g., 'My App Dev Store'), store purpose (select 'Development store'), and your role (usually 'Developer').
-
Configure Store Settings
Choose a store theme (any theme works for development), select store address (can be dummy), and complete setup.
-
Enable Development Mode
Your development store is automatically in development mode. You can access it, add test products, and configure settings.
Important Notes:
- Development stores are free and unlimited - create as many as needed
- Development stores expire after 90 days of inactivity but can be extended
- Development stores have full Shopify functionality for testing
- You can reset development stores anytime without cost
| Feature | Development Store | Production Store |
|---|---|---|
| Cost | Free | $29-$299+/month |
| Limit | Unlimited | One per plan |
| Purpose | Testing & development | Live selling |
| API Access | Full access | Full access |
| Expiration | 90 days inactive | Never (if paid) |
| Customers | Test customers only | Real customers |
| Best For | App development | Actual business |
Step 3: Configure API Access
To allow custom app development, you need to set up API access and credentials.
Option A: Create Custom App via Partner Dashboard
-
Go to Apps Section
In Partner Dashboard, click 'Apps' in the left sidebar, then click 'Create app'.
-
Choose App Type
Select 'Custom app' (for private, store-specific apps) or 'Public app' (for App Store distribution).
-
Configure App Settings
Enter app name, select development store, configure app URL and redirect URLs for OAuth.
-
Set API Permissions
Select required API scopes (permissions) your app needs: products, orders, customers, content, etc.
-
Generate Credentials
Shopify will generate API key and API secret. Save these securely - you'll need them for authentication.
Option B: Use Shopify CLI (Recommended)
# Install Shopify CLI
npm install -g @shopify/cli @shopify/theme

# Generate new app
shopify app generate

# Follow prompts:
# - Choose app template (Node.js + React recommended)
# - Enter app name
# - Select development store
# - Choose app type (custom or public)
Shopify CLI automatically:
- Creates app structure
- Configures OAuth
- Sets up local development environment
- Generates API credentials
- Creates test app in your development store
Step 4: Set Up App Permissions (Scopes)
App permissions (scopes) determine what data and actions your custom app can access.
| Scope | Permission | Use Case |
|---|---|---|
| read_products | Read product data | Display products, sync inventory |
| write_products | Create/edit products | Import products, update inventory |
| read_orders | Read order data | Order analytics, reporting |
| write_orders | Create/edit orders | Order import, manual order creation |
| read_customers | Read customer data | Customer analytics, segmentation |
| write_customers | Create/edit customers | Customer import, CRM sync |
| read_content | Read content | Blog posts, pages access |
| write_content | Create/edit content | Content management |
| read_themes | Read theme data | Theme analysis, backups |
| write_themes | Edit themes | Theme customization apps |
Best Practices for Permissions
Permission Guidelines
- Request only necessary permissions (principle of least privilege)
- Start with read permissions, add write only when needed
- Document why each permission is required
- Review permissions regularly and remove unused ones
- For public apps, justify permissions in App Store review
Step 5: Configure Local Development Environment
Set up your local machine for custom app development.
-
Install Node.js
Install Node.js 18+ from nodejs.org. Verify installation: `node --version` and `npm --version`.
-
Install Shopify CLI
Run `npm install -g @shopify/cli @shopify/theme`. Verify: `shopify version`.
-
Authenticate CLI
Run `shopify auth login` and follow prompts to authenticate with your Partner account.
-
Create App Project
Run `shopify app generate` to create new app. CLI will guide you through setup.
-
Start Development Server
Navigate to app directory and run `shopify app dev`. This starts local server and creates tunnel.
Required Tools
Development Tools
- Node.js 18+ installed
- Shopify CLI installed globally
- Code editor (VS Code recommended)
- Git for version control
- ngrok or Cloudflare Tunnel (for webhooks testing)
- Postman (for API testing)
Step 6: Install and Test Your Custom App
Once configured, install your custom app in the development store.
-
Start Development Server
Run `shopify app dev` in your app directory. CLI will provide installation URL.
-
Access Installation URL
Open the provided URL in browser. You'll be redirected to Shopify for OAuth authorization.
-
Authorize App
Review requested permissions and click 'Install app' to authorize access to development store.
-
Complete OAuth Flow
After authorization, you'll be redirected back to your app with access token.
-
Verify Installation
Check Partner Dashboard → Apps → Your App → Installations to confirm app is installed.
-
Test API Access
Make test API calls to verify permissions work correctly. Start with simple read operations.
Common Configuration Scenarios
Scenario 1: Private Custom App for One Store
Best for: Store-specific solutions, client work
Setup:
- Create custom app (not public)
- Install only in target store
- No App Store submission needed
- Fastest deployment (hours/days)
Scenario 2: Custom App for Multiple Stores
Best for: Agency solutions for multiple clients
Setup:
- Create custom app
- Install in each client’s store separately
- Each installation requires separate OAuth
- Manage installations through Partner Dashboard
Scenario 3: Testing Before Public Release
Best for: Validating app before App Store submission
Setup:
- Create public app (but keep unlisted)
- Install in development stores for testing
- Refine based on feedback
- Submit to App Store when ready
| Aspect | Custom App | Public App |
|---|---|---|
| Setup Time | Hours | Days |
| App Store Review | Not required | Required (1-3 weeks) |
| Target Audience | Specific stores | All Shopify merchants |
| Installation | Manual per store | Self-service via App Store |
| Distribution | Private | Public |
| Best For | One-off solutions | Scalable products |
Troubleshooting Common Issues
Common Problems & Solutions
- Can't create development store → Verify Partner account is active
- API calls failing → Check API credentials and permissions
- OAuth redirect errors → Verify redirect URLs in app settings
- Development store expired → Extend store or create new one
- CLI authentication fails → Run 'shopify auth logout' then login again
- Webhooks not working → Check ngrok/tunnel configuration
- Permission denied errors → Verify API scopes include required permissions
Security Best Practices
Security Guidelines
- Store API credentials securely (use environment variables)
- Never commit credentials to Git repositories
- Use HTTPS for all API calls and redirect URLs
- Implement proper OAuth flow (never skip authorization)
- Request minimum necessary permissions
- Validate and sanitize all user inputs
- Use webhooks for real-time updates (polling is less secure)
- Regularly rotate API credentials
Summary: Setup Checklist
Summary: How to Allow Custom App Development - Checklist
| Step | Action | Time Required |
|---|---|---|
| 1 | Create Shopify Partner account | 5 minutes |
| 2 | Create development store | 2 minutes |
| 3 | Install Shopify CLI | 5 minutes |
| 4 | Generate app project | 5 minutes |
| 5 | Configure API permissions | 10 minutes |
| 6 | Set up local development | 15 minutes |
| 7 | Install app in development store | 5 minutes |
| 8 | Test API access | 10 minutes |
Pro tip: Total setup time: ~1 hour. Once set up, you can create unlimited custom apps. Save your API credentials securely - you'll need them for authentication.
FAQ
Frequently asked questions
How to allow custom app development in Shopify?
To allow custom app development in Shopify: 1) Create a Shopify Partner account at partners.shopify.com, 2) Create a development store (unlimited free stores available), 3) Configure store settings and enable development mode, 4) Set up API access and generate API credentials, 5) Configure app permissions and scopes, 6) Install Shopify CLI for local development, 7) Create your custom app through Partner Dashboard or CLI. Development stores allow full customization without affecting live stores.
Do I need a paid Shopify plan to develop custom apps?
No, you don't need a paid Shopify plan. Shopify Partner accounts provide free development stores specifically for app development. These development stores have full functionality for testing and development. You only need a paid plan if you want to test on a live production store or use Shopify Plus features.
What permissions are needed for custom app development in Shopify?
Custom apps need specific API permissions (scopes) based on functionality: read_products, write_products for product management; read_orders, write_orders for order processing; read_customers, write_customers for customer data; read_content, write_content for content management. Admin API access requires authentication via OAuth. Always request minimum necessary permissions for security.
How do I create a development store for custom app development?
Create a development store by: 1) Log into Shopify Partner Dashboard, 2) Go to 'Stores' section, 3) Click 'Add store' → 'Development store', 4) Choose store type (development only), 5) Enter store name and details, 6) Select development store theme, 7) Enable development features. Development stores are free and unlimited. You can create multiple stores for testing different scenarios.
What is the difference between a custom app and a public app in Shopify?
Custom apps are private apps created for specific stores or merchants. They don't go through App Store review and are faster to deploy. Public apps are listed in the Shopify App Store, available to all merchants, and require Shopify's review process. Custom apps are better for one-off solutions or client-specific needs. Public apps are for scalable solutions targeting multiple merchants.
Conclusion
Allowing custom app development in Shopify is straightforward: create a free Partner account, set up a development store, configure API access, and start developing. No paid Shopify plan is required for development.
Key takeaways:
- Development stores are free - Create unlimited stores for testing
- Partner account is required - But completely free to create
- API access is automatic - Once app is created, you get full API access
- No App Store review - Custom apps deploy immediately
- Full functionality - Development stores have all Shopify features for testing
Next steps: Once setup is complete, start building your app functionality. Use Shopify’s comprehensive API documentation and development tools to build powerful custom solutions.